Burp Extension – HMAC Signature in Custom HTTP Header
In this post I would like to share some steps that were required before testing could begin during a web API penetration test. The scenario of the engagement was:
- A web API that came with a command line client, written in python
The following steps were required to allow effective testing of the API:
- Proxy traffic from the python command line client through burp suite
- Create a Burp extension to replace an HTTP header with an updated HMAC signature, following any traffic manipulation in burp
Proxying Traffic from the Requests Module
To proxy traffic from the python command line client, I used proxychains with the following changes to the default configuration in /etc/proxychains.conf:
#proxy_dns
[ProxyList]
http 127.0.0.1 8080
The client used the requests python module for HTTP traffic. It turns out the requests module bundles its own SSL certificates and therefore does not honour certificates trusted by the operating system. Therefore the best way to proxy traffic without needing to make a code change to the command line client, was to convert the Burp certificate to CRT encoding using openssl:
wget http://127.0.0.1:8080/cert -O /tmp/cacert.der
sudo openssl x509 -inform DER -in /tmp/cacert.der -out /tmp/burp.crt
Following this, set an environment variable for the requests module:
export REQUESTS_CA_BUNDLE=/tmp/burp.crt
The client now trusts the SSL certificate presented by burp:
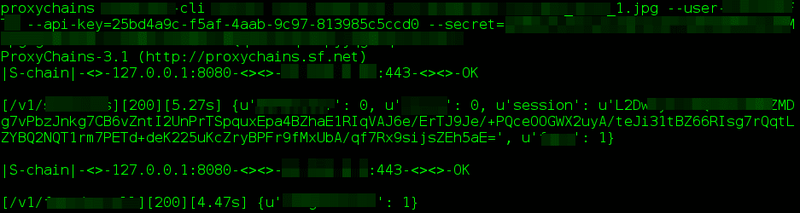
A very pixelated screenshot of the client interacting with the server through burp, using proxychains
The HMAC
The next step was to create a burp extension to update an HTTP header, with a valid HMAC signature following any traffic manipulation in burp. The HMAC was comprised of the following:
HMAC(API secret
HTTP method
Endpoint
HTTP body)
Burp Extension Code
The following code was adapted from here:
from burp import IBurpExtender
from burp import ISessionHandlingAction
from burp import IParameter
from java.io import PrintWriter
import hashlib
import hmac
import base64

class BurpExtender(IBurpExtender, ISessionHandlingAction):
#
# implement IBurpExtender
#
def registerExtenderCallbacks(self, callbacks):
	stdout = PrintWriter(callbacks.getStdout(), True)
	self._callbacks = callbacks
	self._helpers = callbacks.getHelpers()
	callbacks.setExtensionName("HMAC Header")
	stdout.println("HMAC Header register")
	callbacks.registerSessionHandlingAction(self)
	stdout.println("Session handling")
	return

def getActionName(self):
	return "HMAC Header"

def performAction(self, currentRequest, macroItems):
	#UPDATE APISecret
	APISecret = "abc"
	stdout = PrintWriter(self._callbacks.getStdout(), True)
	stdout.println("performAction")
	requestInfo = self._helpers.analyzeRequest(currentRequest)

	#acquire API key and API endpoint from HTTP headers

	headers = requestInfo.getHeaders()

	for header in headers:
		#quick hack
		try:
			if (header.split(" "))[2] == "HTTP/1.1&":
			method = header.split(" ")[0]
		except IndexError:
			pass

	if(header.split(" ")[0]== "X-Apikey:"):
		APIKey=header.split(" ")[1]
	elif(header.split(" ")[0]=="POST"):
		endpoint=header.split(" ")[1]

	#acquire body

	msgBody = currentRequest.getRequest()[requestInfo.getBodyOffset():]

	# converting byte array type of HTTP body to string, to allow HMAC computation
	msg=("".join(chr(i) for i in msgBody))
	hashstring = method + '\n' + endpoint + '\n' + msg + ''
	hashstring = bytes(hashstring).encode('utf-8')
	APISecret=bytes(APISecret).encode('utf-8')
	_hmac = base64.b64encode(hmac.new(APISecret, hashstring, digestmod=hashlib.sha256).digest())

	#headers.add('HMAC-Signature: %s' % _hmac)
	stdout.println("sig " + _hmac)

	i=0
	for header in headers:
		if(header.split(" ")[0]="X-Signature:"):
			headers[i]="X-Signature: "+ _hmac
		i=i+1

	# Build new Http Message with the new Hash Header
	message = self._helpers.buildHttpMessage(headers, msgBody)
	#stdout.println(message)
	# Print Header into UI
	#print self._helpers.bytesToString(message)
	# Update Request with New Header
	currentRequest.setRequest(message)
	return
This code could be improved in many ways. However, it was adequate during the limited time available for testing.
Configuring The Burp Suite Extension
To use this code within a similar project you might be working on, follow these steps:
- Open the “Extender” tab on burp
- Next, click “Add.”
- The Load Burp Extension window will open up.
- Choose “Python” as the “Extension type.”
- Select the above script for the “Extension file.”
- Click “next.”
- The output will currently show “HMAC Header register” and “Session Handling” after loading the script.
- Click close.
- We should see “HMAC Header” as an option for Burp Extensions.
- Make sure the “Loaded” and “Extension loaded” at the bottom are checked.
Configuring Session Handling
In this section, we will create a rule to invoke the extension.
- Click the “Project options” tab.
- Then click the “Sessions” tab in the Project options tab.
- Click “Add” under Session Handling Rules to open the “Session handling rule editor.”
- Enter “HMAC Header” as the Rule Description
- Click “Add” on the “Rule Actions” Then choose “Invoke a Burp extension”.
- This will open a new window and we should see HMAC Header in the “Extension action handler:” drop down
- Click OK
- After that, click the “Scope” tab at the top of the window.
- Click which burp functions you would like to use the extension with in the “Tools Scope”
- Ensure the “URL Scope” is correct for your requirements
- Click OK; then we will see the rule in the “Session Handling Rules” option.
Testing the extension
All requests sent from burp should now have a valid HMAC signature, provided it was been included within the “Tools Scope” and “URL Scope” found in “Session Handling Rules”.
You may also be interested in...
During a recent web application test engagement one of the applications in scope was a MOVEit Transfer 2020 web application. While performing the assessment a Stored Cross-Site Scripting (XSS) vulnerability was identified.
See more